Legacy Shopify Themes
When using a Legacy Shopify Theme or if it is your preference, you can add PayPlan buttons directly into your liquid files.
Using a Shopify 2.0 Theme?
If you are using a 2.0 Theme, PayPlan buttons can be added via a customizable theme block.
If you prefer to add the PayPlan buttons directly into your liquid even with a 2.0 theme, you must enable this option through the PayPlan by RBC Messaging App settings. Select the option to "Add Scripts on 2.0 Themes".
Add PayPlan In Theme Files
Placing the PayPlan button on product and cart pages requires making changes to your liquid templates in Shopify. To get started, open your Shopify Admin and click Online Store, choose your theme, and then select Edit code from the Action drop down menu.
Identifying the liquid files in which to add PayPlan will be completely dependent on how your Shopify store theme is organized. Each theme is different which means the right liquid file could be found anywhere including within Templates, Sections, or Snippets.
PayPlan Button on Product Details
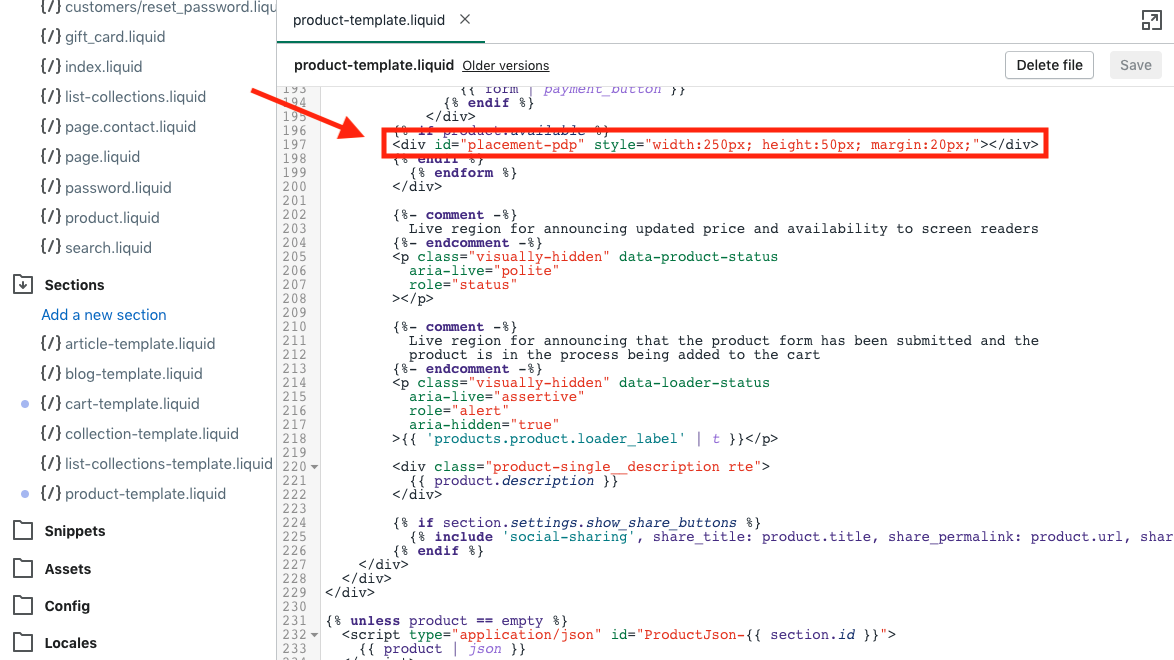
- To find the right liquid template to add PayPlan to your product page, start by looking for the product template containing an “Add to Cart” button. Start with product.liquid and work backwards by looking into the included sections and snippets. Keep looking in sub-files until you find the “Add to Cart” button

Note: that this is general guidance. If your Shopify theme follows a non-standard pattern, you may have to expand your search to other templates.
- Once you have located the right product template, insert the following element under your “Add to Cart” button
{% if product.available %}
<div id="placement-pdp"></div>
{% endif %}
Note
We recommend including Shopify’s product available logic to hide the PayPlan button when the item is out of stock. Additionally, the height, width, and margin of #placement-pdp will determine the size and spacing of the PayPlan button. Modify the example height, width, and margin to fit your product page layout.
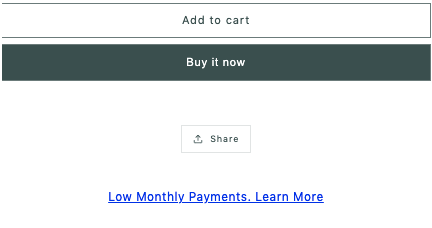
- PayPlan should now appear as a button on your Product page. The next section will provide an overview of further styling of the PayPlan button on your page

PayPlan Button on Cart Page
-
To add the PayPlan button to the Cart page, locate the cart template containing a “Checkout” button.
Note: Start with cart.liquid – if you can’t find the “Checkout” button there, then work backwards by inspecting the included sections and snippets -
Once you have found the right template, insert the following element under your “Checkout” button
{% if cart.item_count > 0 %}
    <div id="placement-cart" style="height:50px; margin:20px 0px;"></div>
{% endif %}
PayPlan should now appear as a button on your Cart Page. The next section will provide an overview on further styling of the PayPlan button on your page
Note: For a better user experience, we recommend styling the above product and cart elements to appear as buttons. By configuring a fallback element, your customers will still see a complete and coherent page while the PayPlan button loads, or if it is unavailable.
// PayPlan button for product pages with fallback element
<div id="placement-cart" style="width:250px; height:50px; background-color:#000; color:#FFF; text-align:center; line-height:50px;">
  Pay Over Time
</div>
Note
Every Shopify theme handles browser width and device (desktop vs mobile) size differently. Open one of your product pages in a desktop browser and shrink/expand the browser horizontally. Similarly, try opening a product page on a mobile phone. Pay attention to how your “Add to Cart” buttons adapt to different widths and devices and make sure your PayPlan button responds similarly. You may have to use CSS media queries to ensure a consistent style between your Add to Cart and PayPlan buttons.
Updated over 2 years ago
