BigCommerce Integration Steps
STEP 1: Install and Configure PayPlan By RBC
Installation Steps
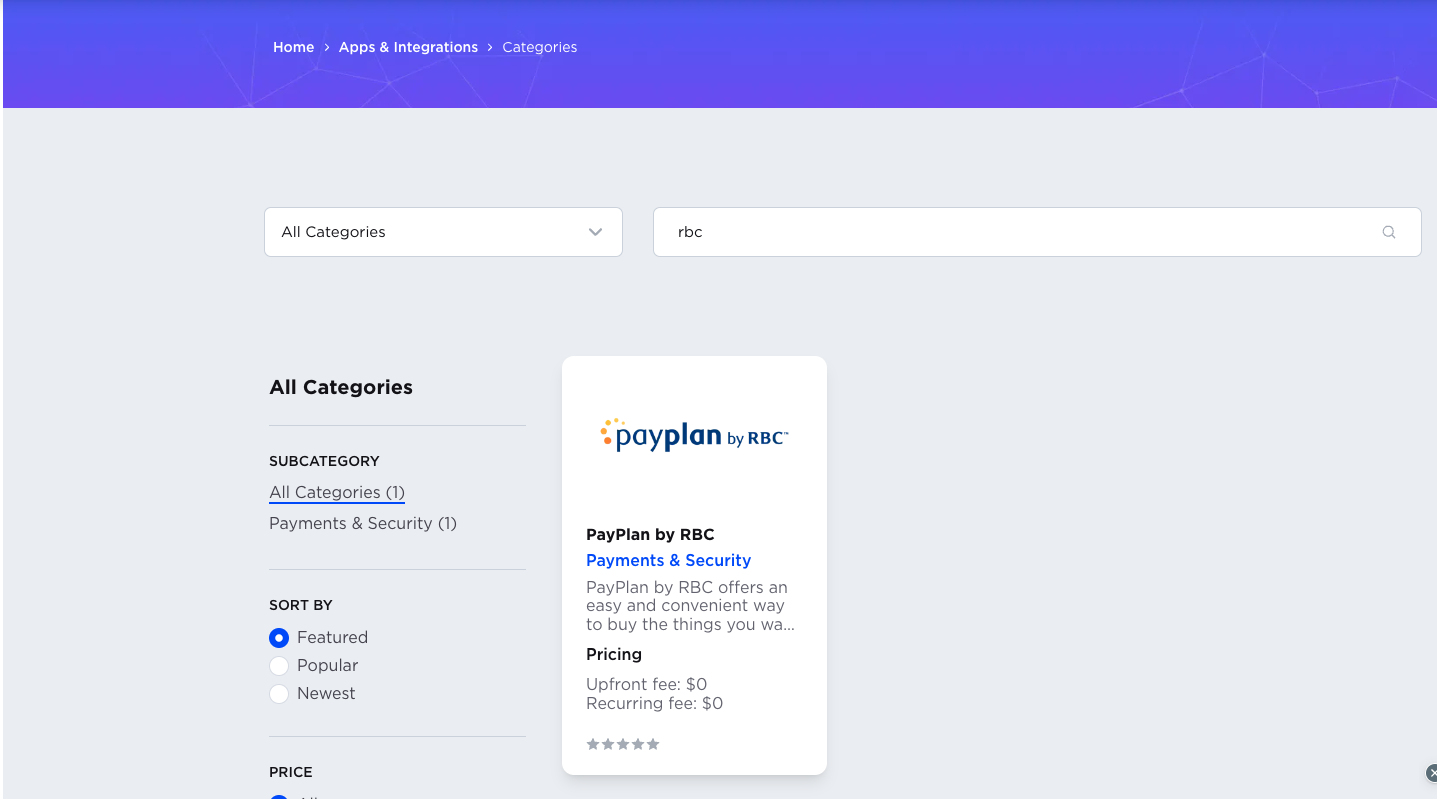
- Get started by logging into your BigCommerce store. From the left-hand menu, select Apps > Marketplace. Search for “PayPlan” and click on the result that displays the PayPlan logo

- Click on the logo to see the Payplan by RBC App details page. From here, click Install to add the Payplan App to your store.
Locate your Preview API key, API secret, and Integration keys
To configure the PayPlan app, you will need Preview Access Keys. These keys are available in your Merchant Portal. Preview versions of these keys will be needed when running test transactions, and you should work with these keys first. The Integration Manager supporting you will set up access to the portal.
PayPlan Sandbox Credentials: https://merchants-preview.rbc.breadpayments.com/
PayPlan Live Credentials: https://merchants.rbc.breadpayments.com/
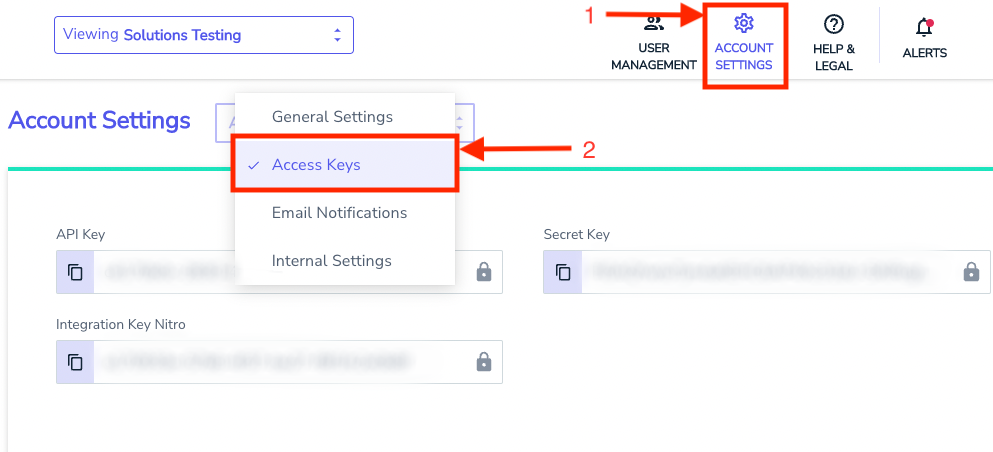
Once logged in, first click on "Account Settings". Then click on the Account Settings drop-down and select "Access Keys" to view your credentials. Keep this page open as you will need to reference these keys shortly.
Plugin Settings And Configuration
In this section, we will first walk through the steps to get Payplan working on your BigCommerce site. There will be information on the different configuration options found at the bottom of the section.
Once the Payplan App is installed, you can find it in your store under Apps > My Apps > PayPlan by RBC. Click on PayPlan by RBC to access the app, then click on General Settings from within the app.
Enter Your Preview API Keys
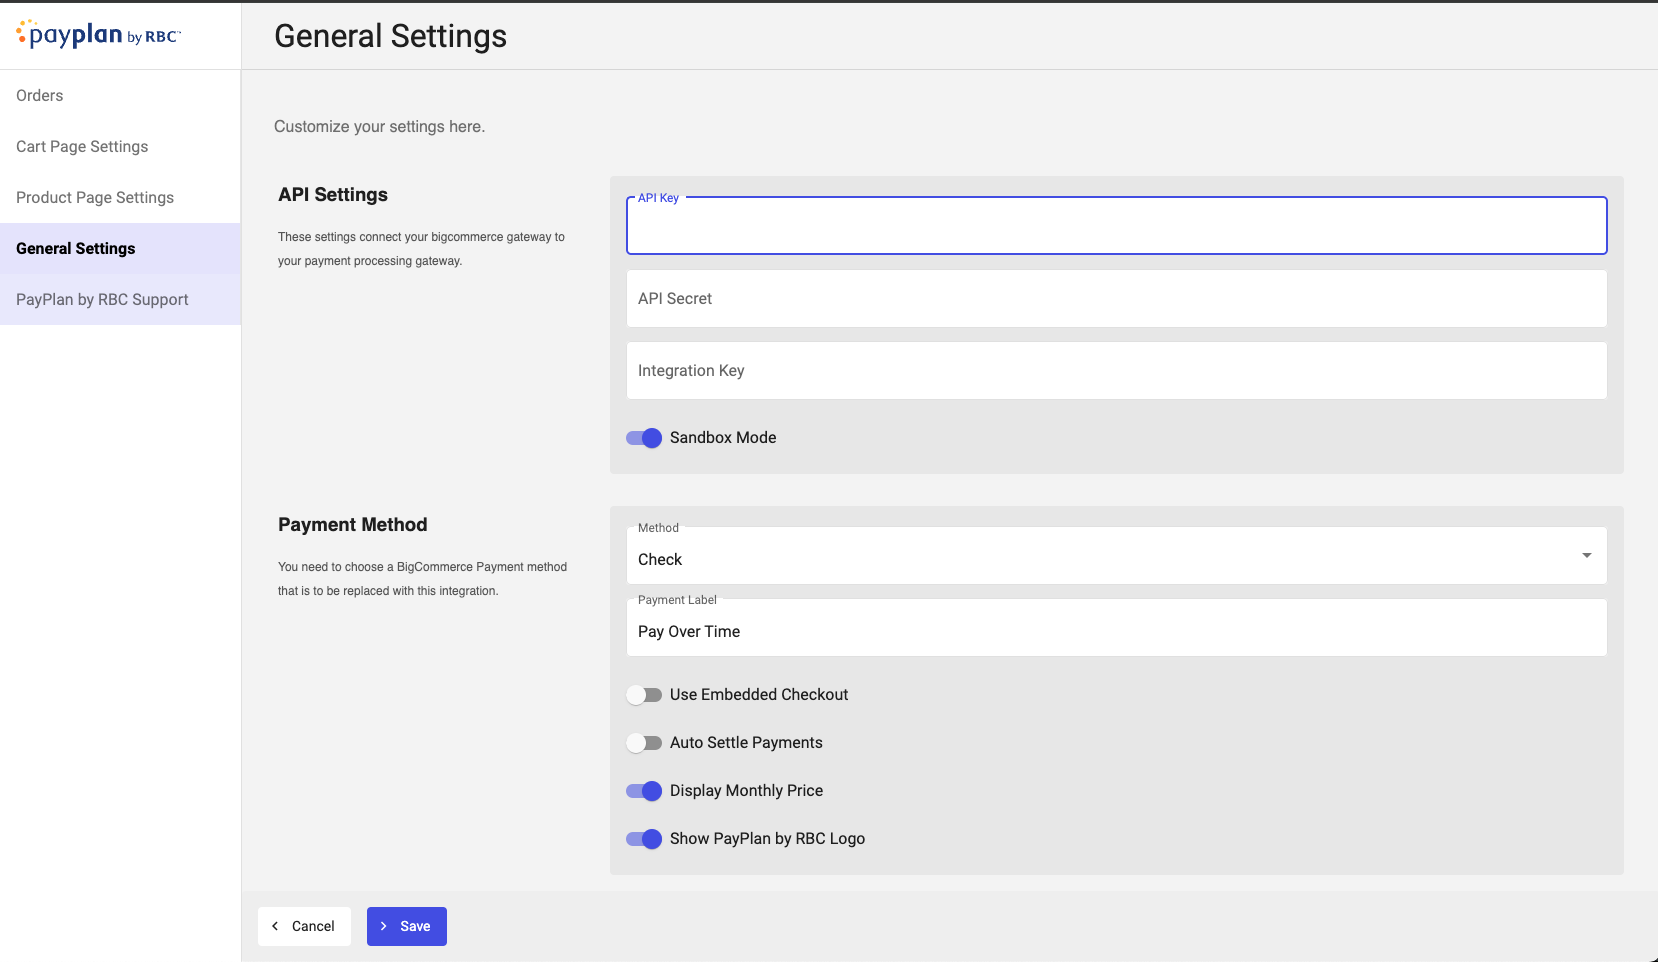
Your PayPlan API keys, which tie transactions made from your store to your Payplan account, should be entered into API Key and API Secret under API Configuration. First, find your Preview API keys in your Preview PayPlan merchant portal. You should be able to log in with credentials provided by your main success point of contact.
Your API and Secret key will be listed within the PayPlan merchant portal under Account > API, Secret and Integration Keys. Copy the API Key, Secret Key, and Integration Key, and paste both into their corresponding fields within the BigCommerce app. Additionally, make sure Use Sandbox Mode? is enabled.
Once these changes have been made, hit the Save button in the lower right corner of the PayPlan App settings.
Step 2: Adding the PayPlan By RBC™ Buttons
Adding PayPlan to the Product Page
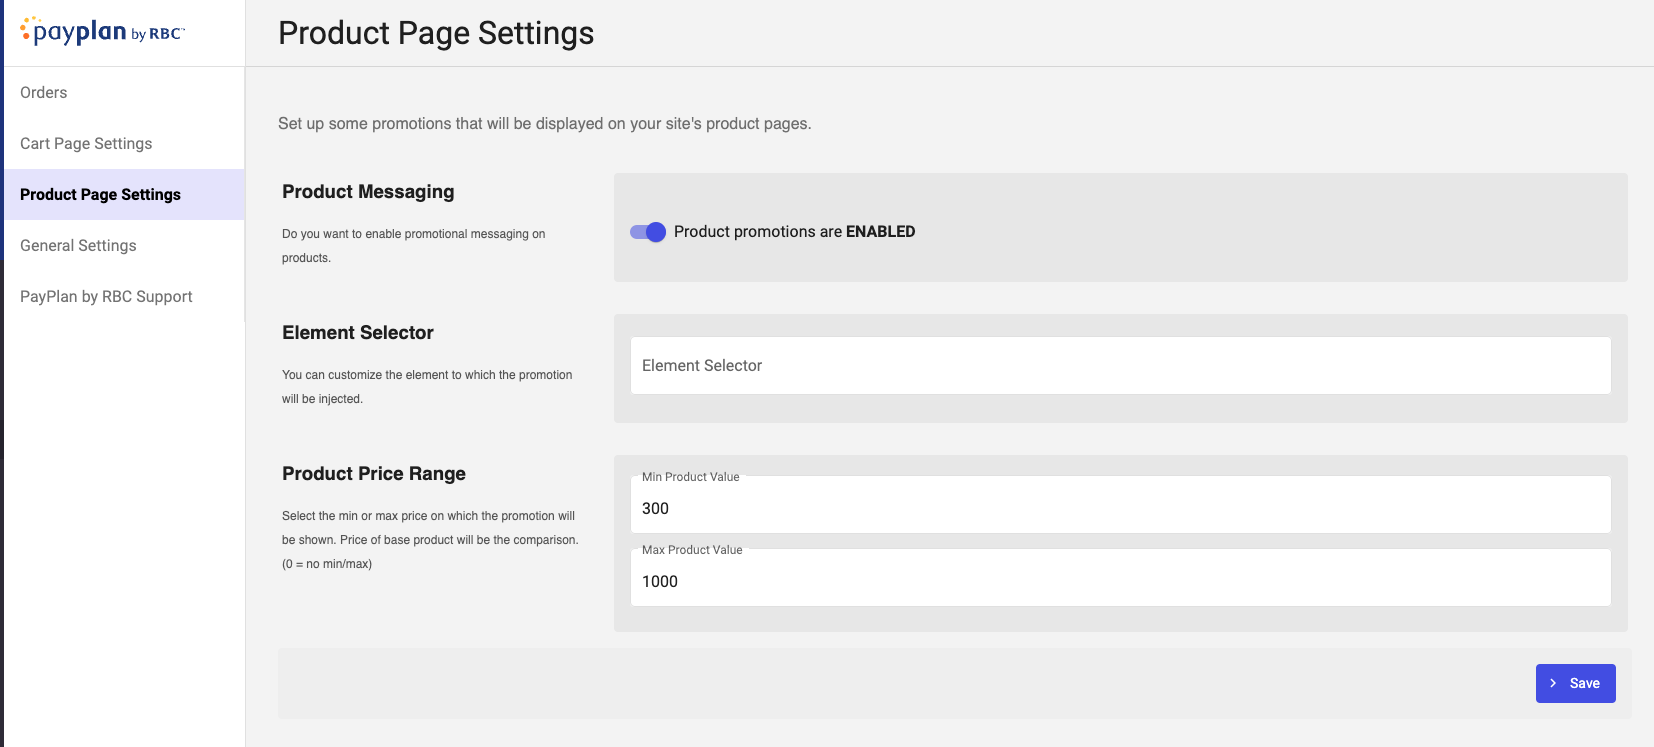
Navigate to the Product Page Settings in the menu. Make sure Product promotions are enabled and click Save.
Adding PayPlan to the Cart Summary Page
Navigate to the Cart Page Settings in the menu. Make sure Cart promotions are enabled and click Save.

Adding PayPlan to the Checkout Page
-
Navigate back to the General Settings and scroll down to Payment Method.
-
You should now see additional options
a. Note: ALL products are REQUIRED to have product images and SKUs for PayPlan to load successfully on your checkout page.
-
Select Check (recommended) or another preferred unused payment method in the Drop down. We recommend using Pay Over Time as the payment label. The unused Payment method selected here will be replaced by Pay Over Time.
-
Next, we need to set up the unused Payment Method selected in Step 3. While logged into your BigCommerce admin, navigate to Settings, Under Setup click Payments.
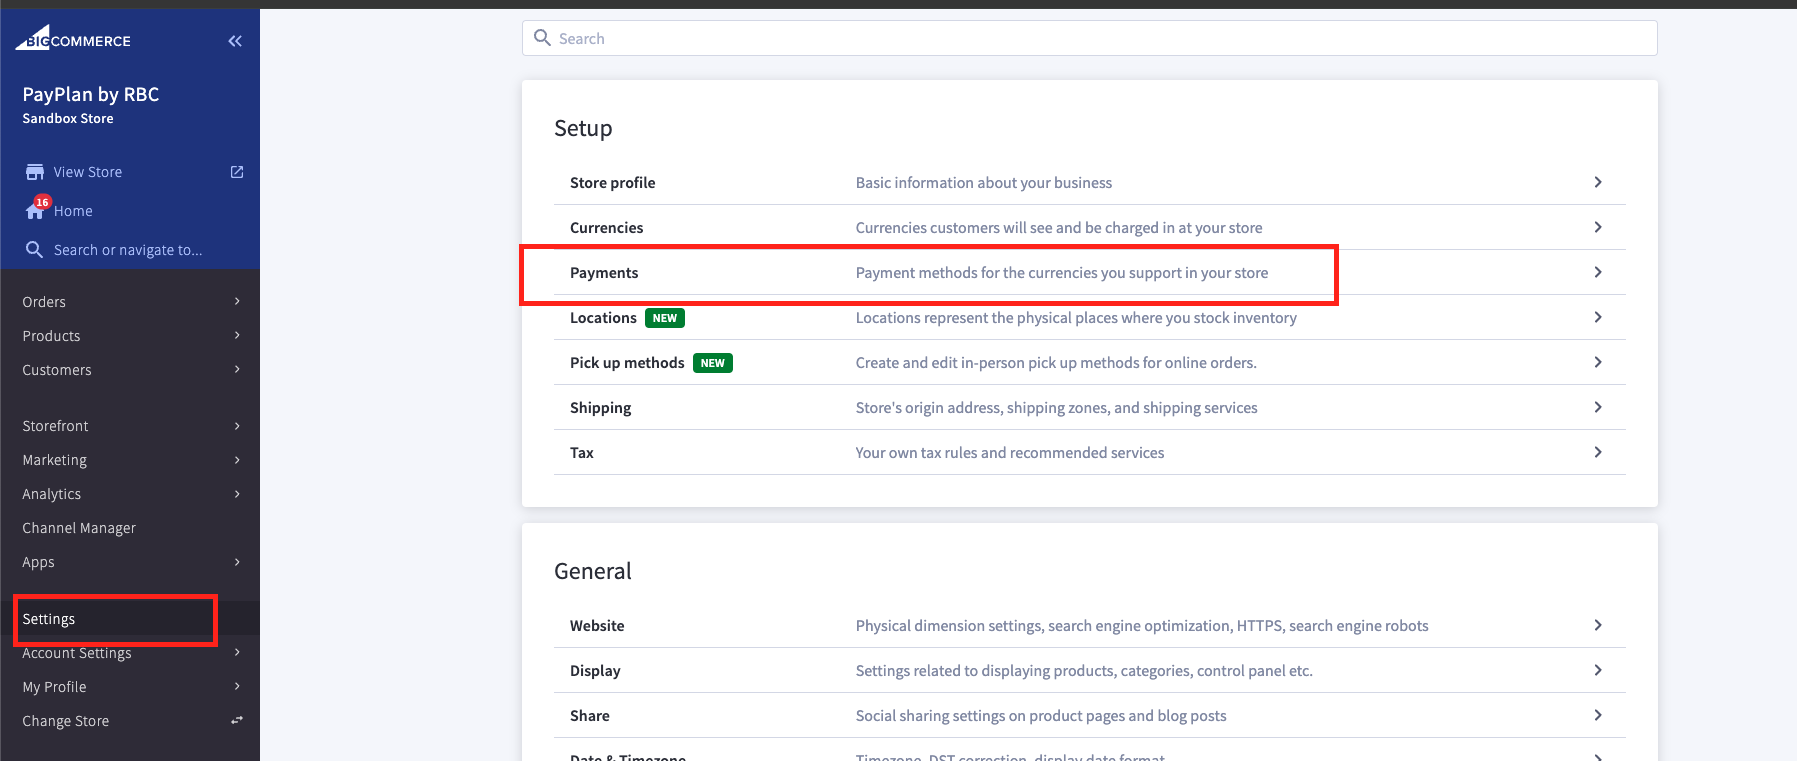
- If your store uses BigCommerce Optimized One-Page Checkout, scroll down and expand Offline Payment Methods. Next to the Payment method chosen in step 3 (Check is recommended), click Set Up.

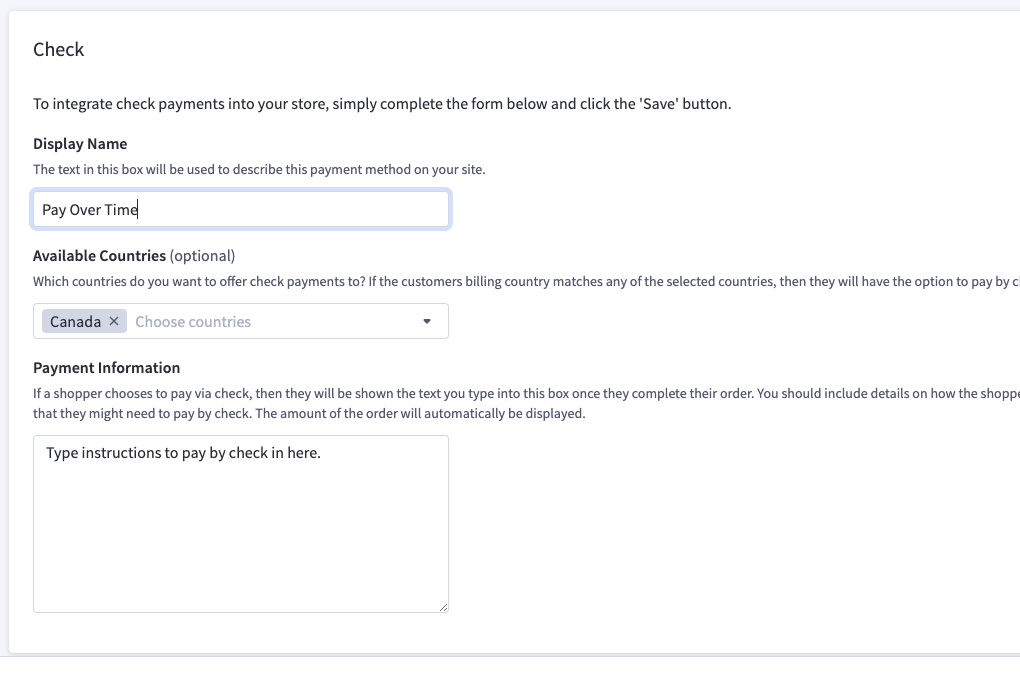
- Configuration may vary depending on the Payment Method Chosen. Be sure to set this Payment Method for CAD. Enter a Display Name such as "Pay Over Time". Set Available Countries to "Canada" and leave a customizable message that will be displayed upon checkout confirmation (this is required for COD). Then Click Save.
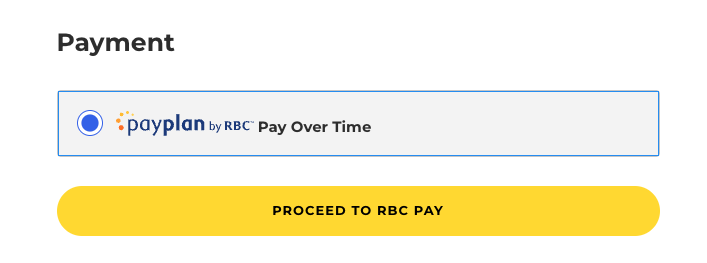
- You should now be able to see the payment method on the checkout page.
Step 3: Testing PayPlan By RBC™
We strongly recommend you test your PayPlan integration with your sandbox API keys and our sandbox domain before pushing PayPlan live on your production site. You can leverage the following dummy data when testing PayPlan in sandbox mode.
- Any name, address and email
- Mobile Number: A random sequence of 10 digits – don’t use duplicates or sequential numbers (e.g. 555-555-5555 or 123-456-7890)
- Mobile Code / Token: 1234
- Birth Date: A birth date before 2000
- Last 4 Digits of SSN: 07xx (Any 4-digit number starting with 07, such as 0789) to simulate approval, or 0400 to simulate denial.
Sandbox Testing
Note: You will not receive emails nor text messages when testing in sandbox mode. Please refer our Testing documentation for additional guidelines.
Step 4: Going Live with PayPlan
In order to go from a preview to a production environment, you will need to switch off sandbox mode and insert the proper API keys.
- Go down to the General Settings section and switch off sandbox mode.
- Enter your Production API Key, Secret Key, and Integration Key in their respective fields. (Your API and Secret keys can be found in the PayPlan Merchant Portal)
- After making these changes click “Save changes”.
Updated about 1 year ago
